Keep your email from falling into the wrong tab
Email inboxes are notorious for losing important emails in random tabs and folders.
But with a few simple steps, you can ensure SXSW stays in your inbox using these simple whitelisting instructions.
Gmail
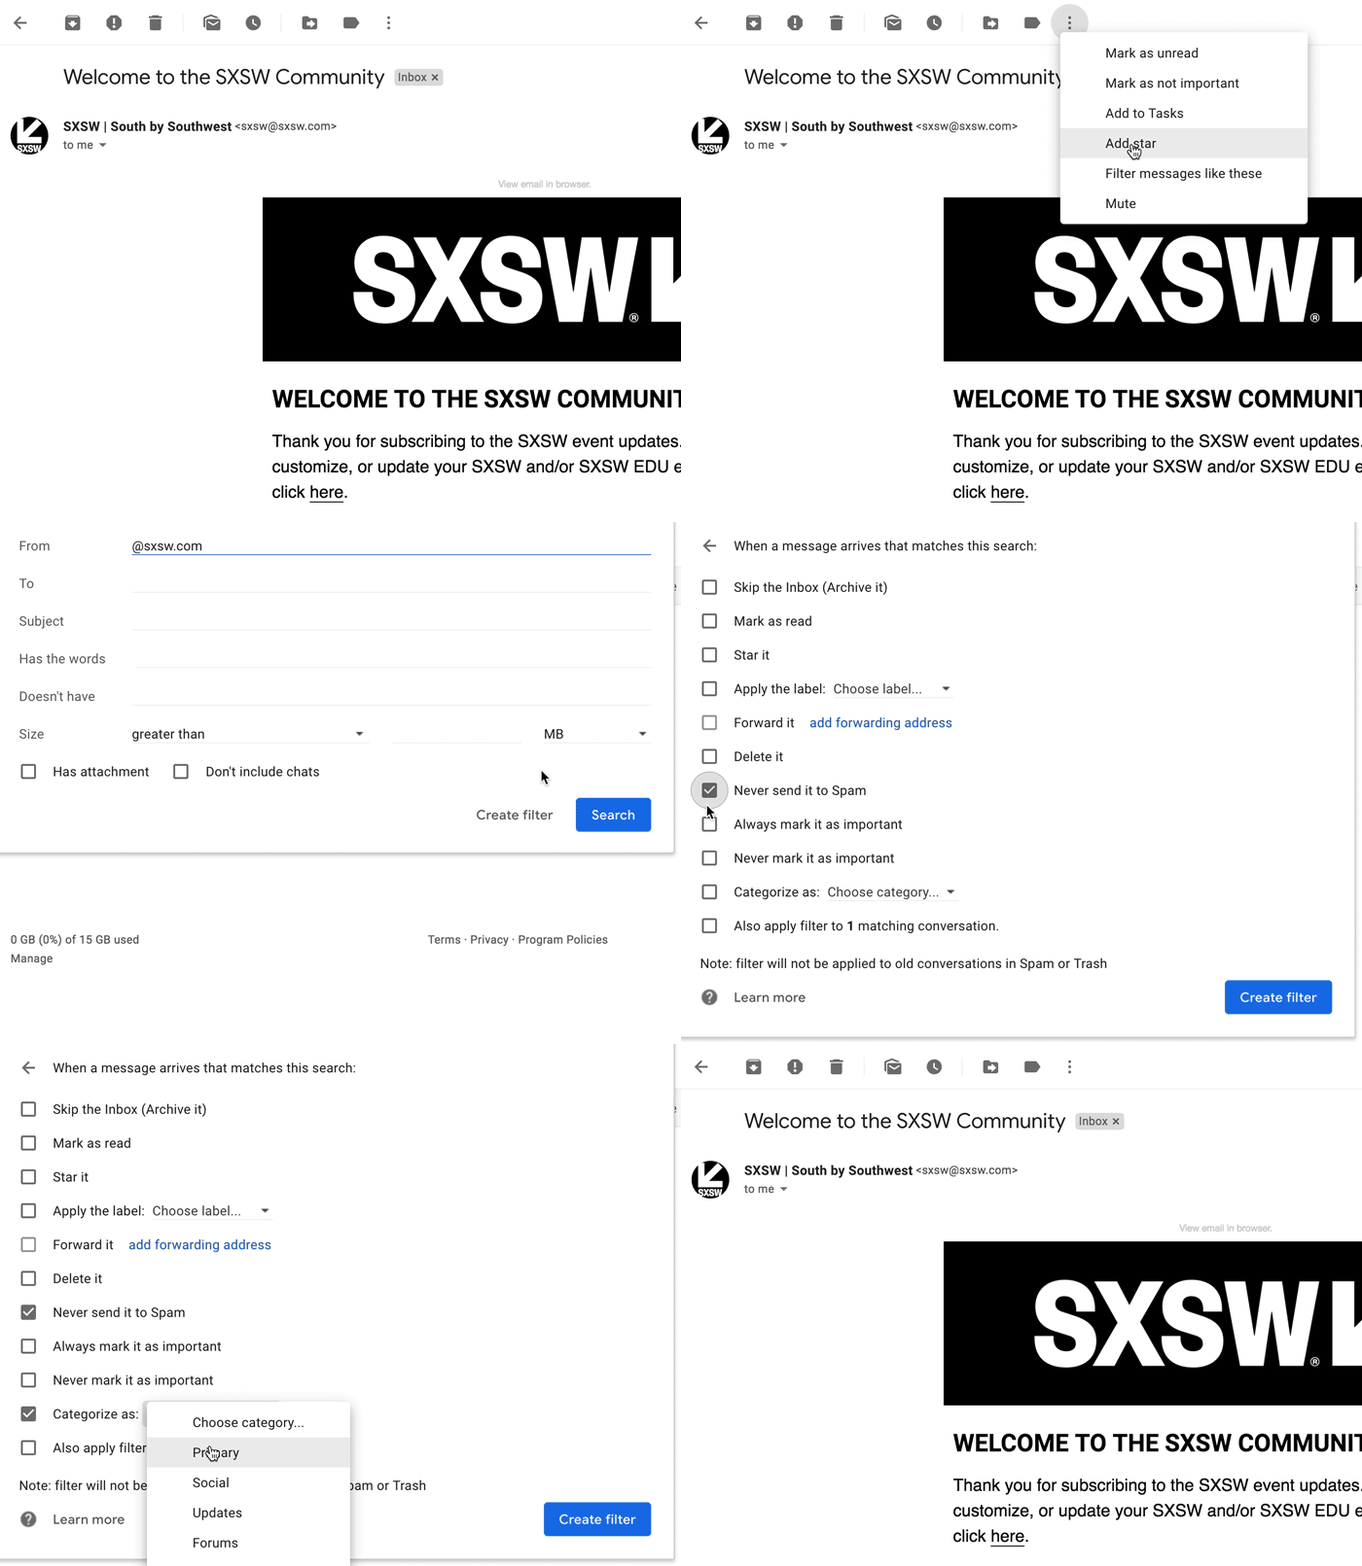
Find and open the email in your inbox.
Click the three dots in the top right, then "Filter messages like these"
Enter the email domain (in our case this is @sxsw.com) to ensure any other aliases will fall into the new filter
Check "Never Send it to Spam" and then set "Categorize as:" to "Primary"
Select "Create Filter"
Done!
If you are on your phone, you can also tap the three dots in the top right corner and click "Mark important" to give the email priority. If you need more information, follow these instructions.

Apple Mail
Apple Mail is slightly different - you have to create a rule. But don't worry, it's not too complicated.
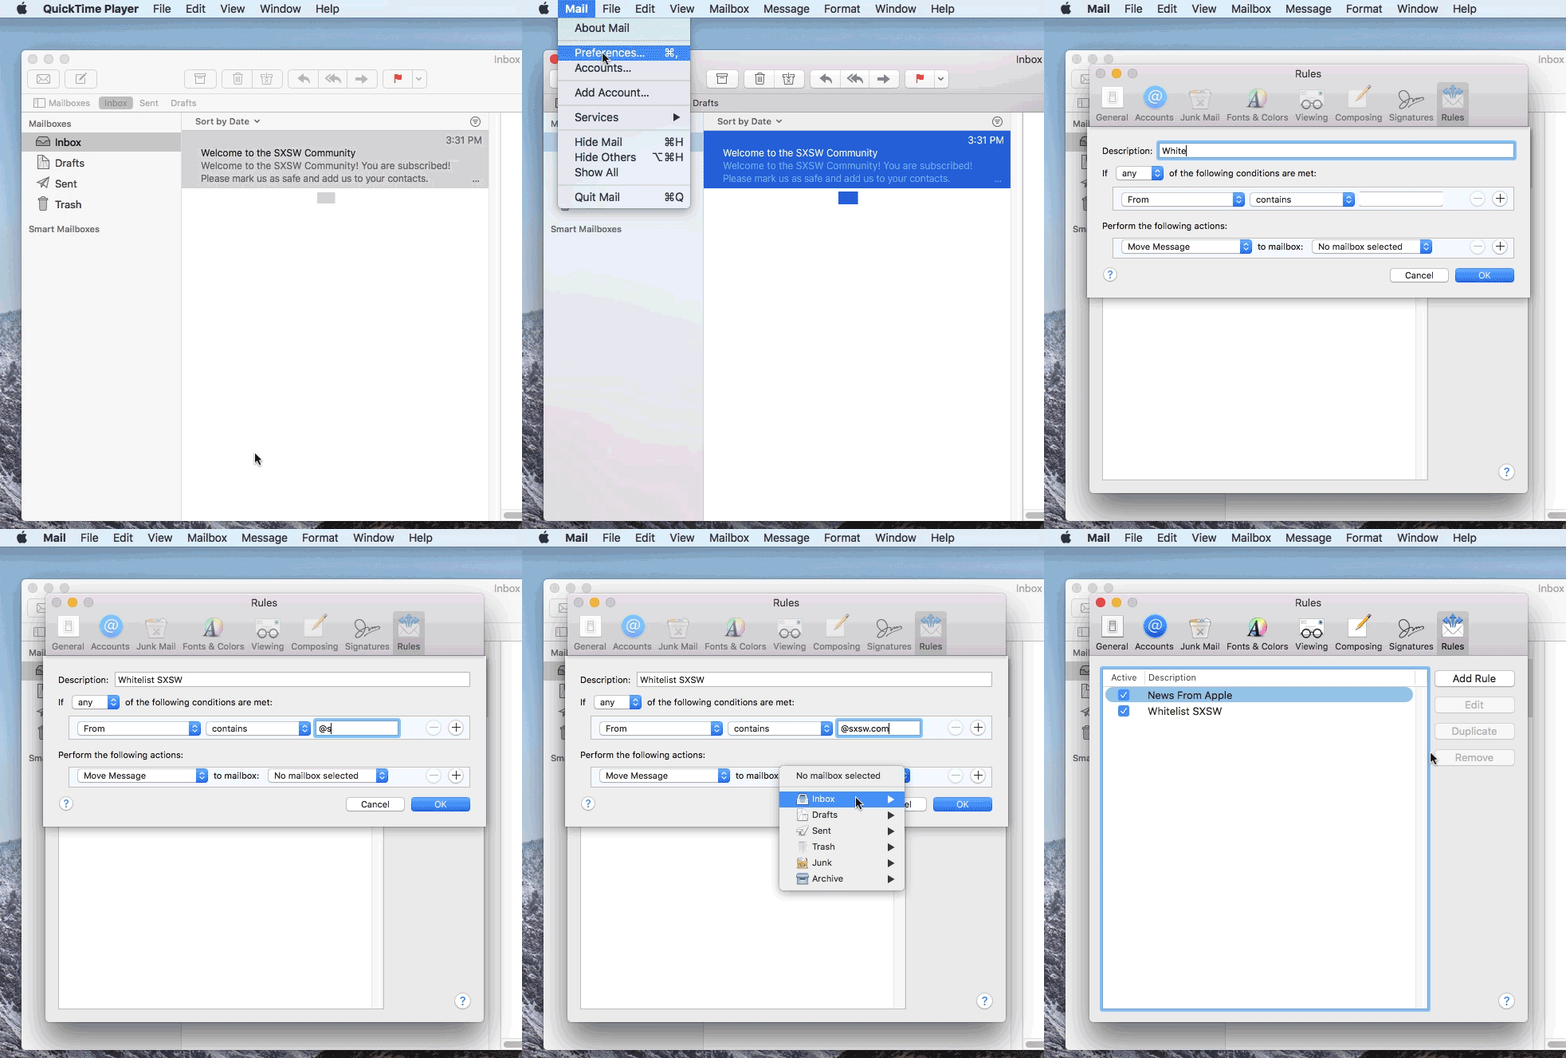
Go to "Preferences" in the top menu under Mail
Click on "Add Rule"
Change the description, and enter the email domain (in our case @sxsw.com) in the conditions area (That is, under "If any of the following conditions are met")
On the same page under "Perform the following actions" change "No Mailbox selected" to "Inbox" in the dropdown
Click "OK".
You're done!
Apple has more information here.

Microsoft/Outlook
In Outlook you'll have to create an inbox rule.
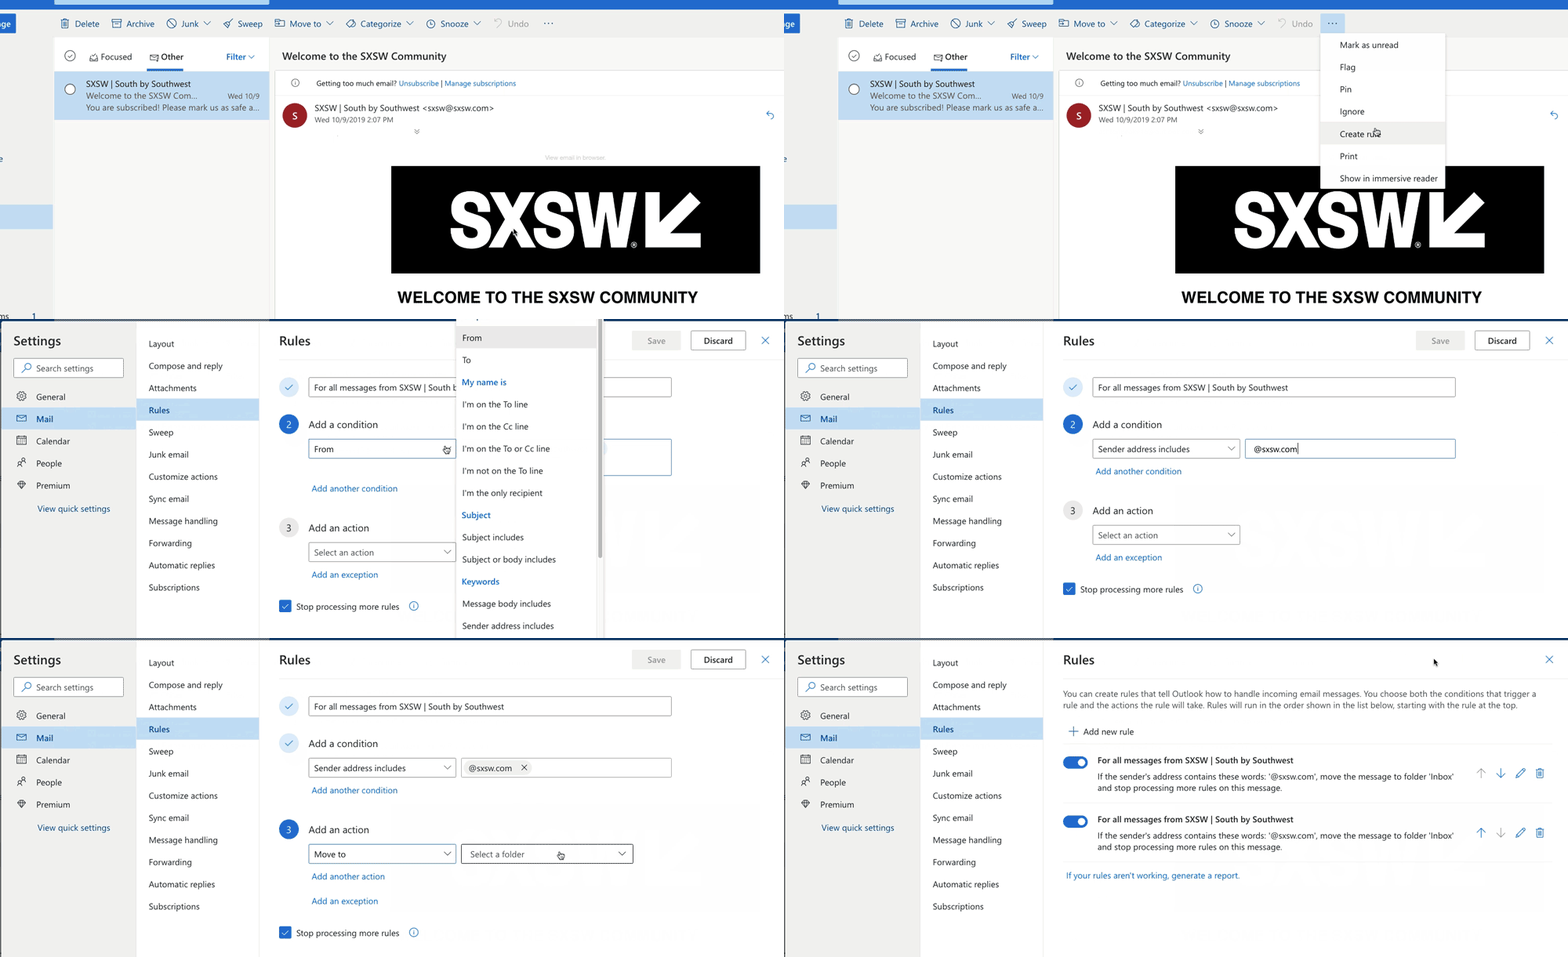
Click the three dots in the top right and go to "Create rule"
Go to "More Options"
On the Rules page there are three small steps:
Make sure it's For all messages
Add a condition": change this from "From" to "Sender address includes" and enter the domain (in our case @sxsw.com)
Add an action - organize change "Select an action" to 'Move to" and then where "Select Folder" is, change this to "Inbox"
More information about Inbox Rules.

Yahoo
Click the top three dots in the top right
Click "Filter messages like this..."
Go to "More Options"
Under "Set Rules" change contains to the email domain (in our case @sxsw.com)
Scroll down to Subject and remove any content there
Finally under "Chose a folder to move in" select "Inbox" and save

Other Clients
If your email client falls outside of these we recommend searching "[client] email whitelisting" on your web browser.


